
Installing NivoSearch takes just a few minutes and doesn’t require any coding knowledge.
You can install the plugin directly from your WordPress dashboard or upload the plugin ZIP file manually. Once installed, you’ll be ready to replace the default WooCommerce search with a fast, live product search experience.
Before You Begin
Before installing NivoSearch, make sure your website meets these requirements:
- WordPress 5.6 or later
- WooCommerce installed and activated
- PHP 7.4 or later
- Administrator access to your WordPress dashboard
Tip: NivoSearch is designed exclusively for WooCommerce stores. Make sure WooCommerce is installed before activating the plugin.
Step 1: Sign in to your WordPress admin dashboard.
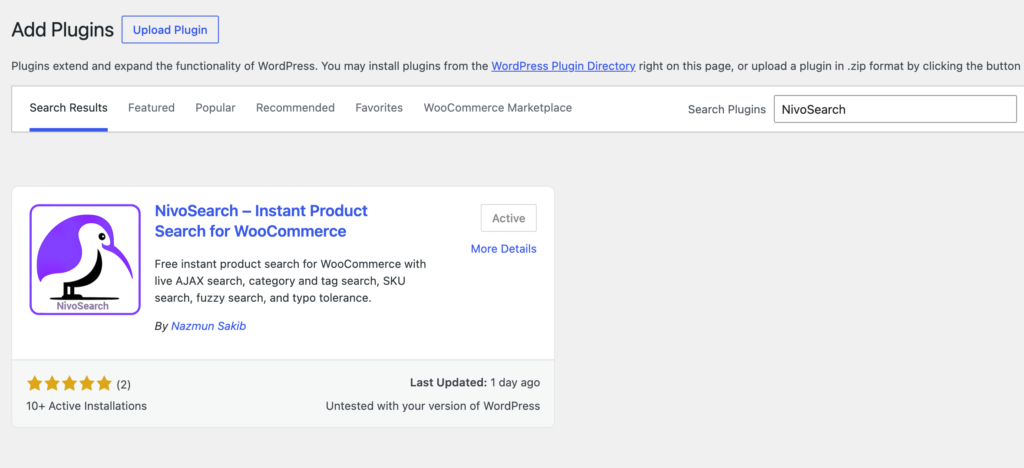
Step 2: Go to Plugins → Add New Plugin
Step 3: Search for: NivoSearch
Step 4: Click Install Now.
Step 5: Once the installation is complete, click Activate.
Install Using the Plugin ZIP File
If you’ve downloaded NivoSearch as a ZIP file, you can install it manually.
Step 1: Go to: Plugins → Add New Plugin
Step 2: Click Upload Plugin.
Step 3: Choose the NivoSearch ZIP file from your computer.
Step 4: Click Install Now.
Step 5: After installation finishes, click Activate Plugin.
Verify the Installation
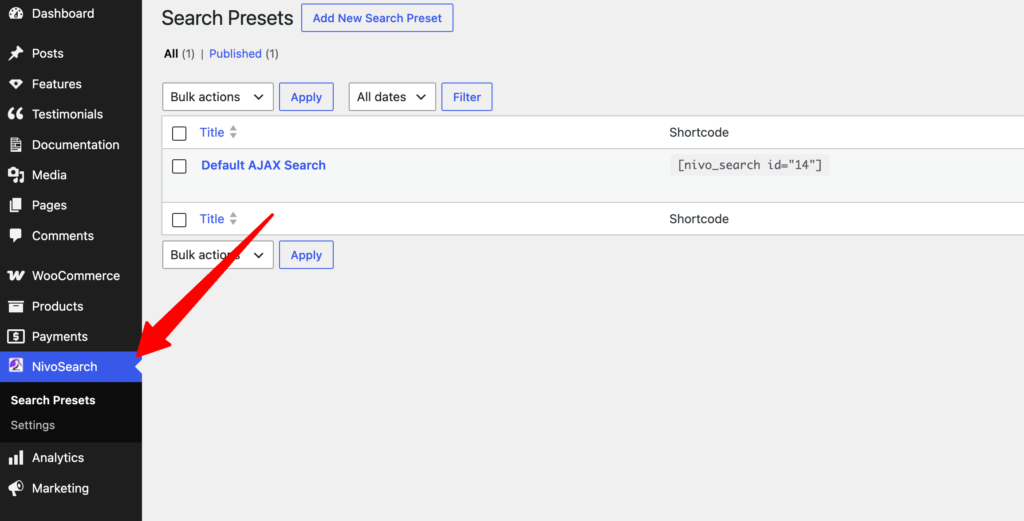
After activation, you’ll see a new NivoSearch menu in your WordPress dashboard.
This confirms that the plugin has been installed successfully.
From there, you can start configuring your search experience or quickly replace your existing WooCommerce search bar.
Need Help?
If you experience any problems during installation:
- Confirm that WooCommerce is installed and activated.
- Make sure your website meets the minimum system requirements.
- Check for plugin or theme conflicts by temporarily disabling other plugins.
- Visit the Troubleshooting section for common installation issues.