
A Search Preset controls how your NivoSearch search bar looks and behaves.
Each preset has its own settings, including the search scope, appearance, layout, and search behavior. You can create multiple presets and use them in different areas of your WooCommerce store.
This guide shows you how to create your first Search Preset.
Before You Begin
Before creating a Search Preset, make sure:
- NivoSearch is installed and activated.
- WooCommerce is installed and activated.
Note: NivoSearch automatically creates a default Search Preset during activation. Creating a new preset is only necessary if you want a different search bar with its own settings or design.
Step 1: Open Search Presets
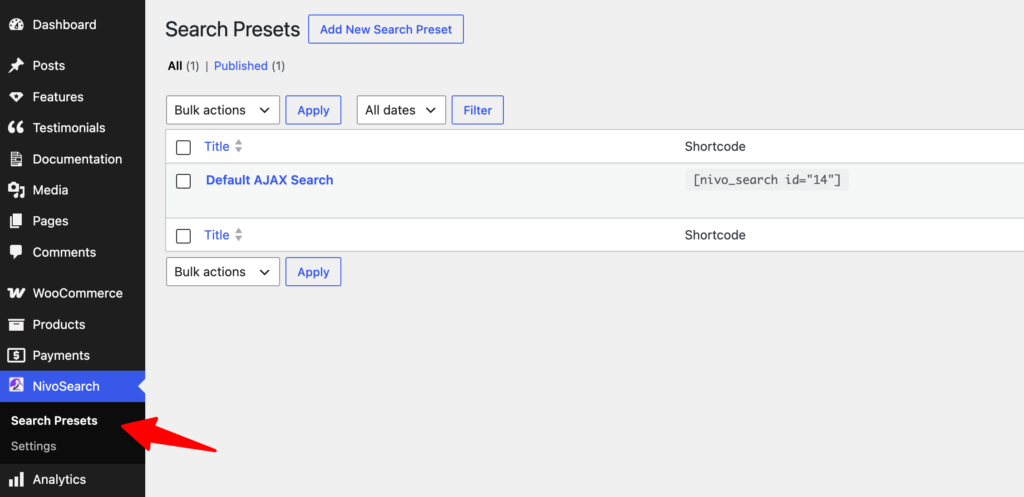
From your WordPress dashboard, go to:
NivoSearch → Search Presets
Here you’ll see all your existing Search Presets.
Step 2: Create a New Preset
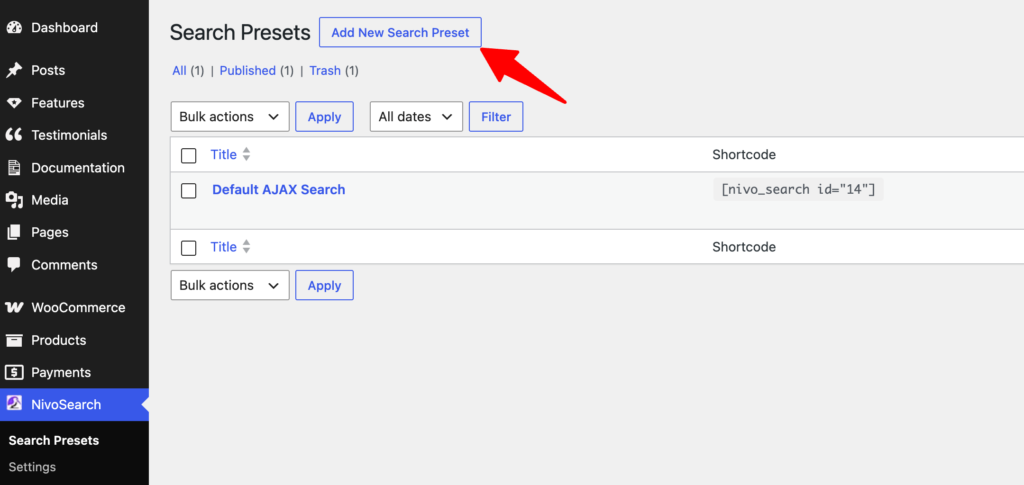
Click Add New Search Preset.
A new Search Preset editor will open.
This is where you’ll configure your new search bar.
Step 3: Give Your Preset a Name
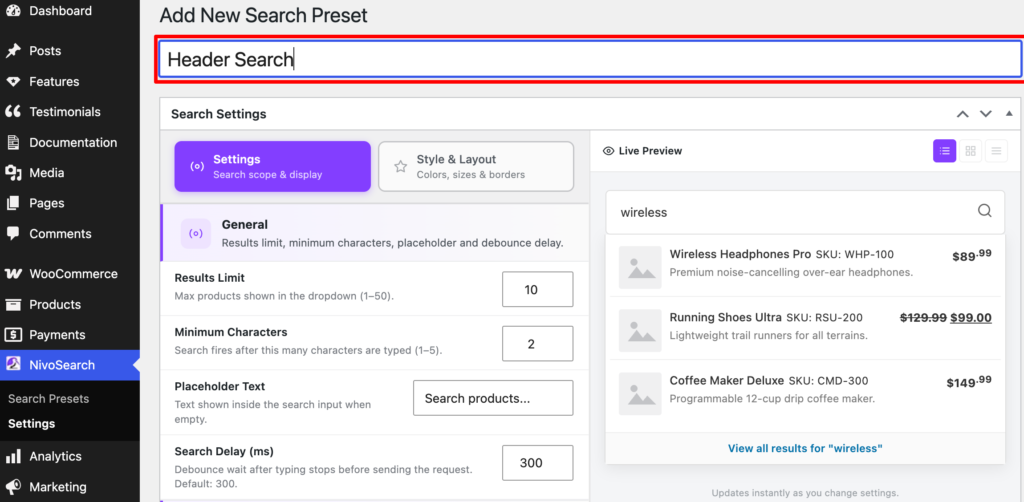
Enter a descriptive title.
For example:
- Header Search
- Homepage Search
- Mobile Search
- Sidebar Search
The title is only used inside your WordPress dashboard to help you identify the preset.
It won’t appear on your website.
Step 4: Configure Your Search Preset
Choose the settings that best match where you’ll use the search bar.
For example, you can:
- Select what customers can search.
- Choose what information appears in the results.
- Customize the search bar design.
- Configure search behavior.
You can always change these settings later.
Step 5: Publish the Preset
Click Publish.
Your new Search Preset is now ready to use.
Step 6: Copy the Shortcode
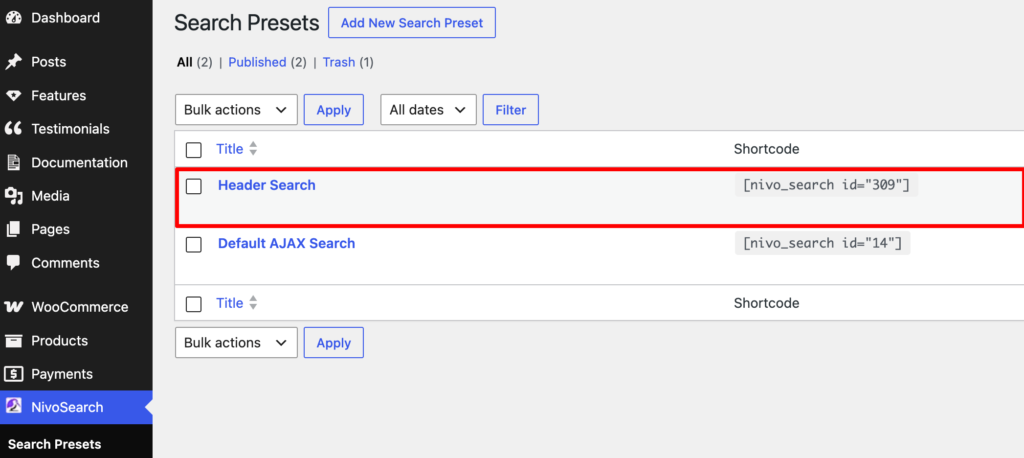
After publishing, return to the Search Presets list.
Each preset has its own shortcode.
It will look similar to this:
[nivo_search id="309"]The number will be different on every website because it’s the unique ID of your Search Preset.
Copy the shortcode.
Step 7: Add the Search Bar to Your Website
Paste the shortcode anywhere shortcodes are supported, including:
- Pages
- Posts
- Widget areas
- Header builders
- Footer builders
- Template builders
Once published, the instant search bar will appear in that location.
Result
You’ve successfully created your first Search Preset.
You can now:
- Display an instant product search bar anywhere on your website.
- Create additional presets with different designs or settings.
- Edit your preset at any time without affecting other presets.
Tips
- Use descriptive names if you create multiple presets.
- Create separate presets for your header, homepage, or mobile layout when different styles are needed.
- If you only need one search bar, the automatically created default Search Preset may already be all you need.